


")

")


Want to become an Influential Blogger?
Then you should start a blog first of all.
Because creating your first website will get you started in the online world and it will offer you the opportunity to present yourself, your talents, hobbies, passions – whatever you want the world to know about – in your own way.
Many influencers mainly use their social media accounts like Instagram or Twitter to amass followers and communicate with them. However, your account’s content relies on their approval and terms and we all know what happened with Donald Trump’s accounts after he lost the presidential elections in America.
When you build a website with an independent content management system and a domain that you have purchased and hosted in your own name with a web host of your choice then you are in charge and it could only be shut down by ICANN (Internet Corporation for Assigned Names and Numbers) and search engines can ban your website to appear, if it does not meet their guidelines.
So, before you get started as a blogger, read these guides that will inform you about the most important factors to consider:
Ultimate Guide For The Best Web Hosting To Start A Blog Or Website and Pros & Cons
Best Blogging Platforms to start a Blog
5 Best cPanel Alternatives for Bloggers to host WordPress Websites (including cPanel)
Now you should know more about your web hosting, control panel and blogging platform options for the best possible start with your blog to reach the top.
How to start a Blog to become an Influencer?
As you would have realised, there are multiple options out there to start a blog. We will focus on the fastest and most effective way to set up a blog here and provide basic guidance so that your blog is up and running in a few minutes – yes, you heard right.
4 Easy Steps to Start Your Own Money Blog

- Domain Registration and Hosting in the Control Panel
- Set Up of your WordPress Blog Inside the SeekaHost App
- Customization of your WordPress Blog
- Starting with Blogging and Publishing
- Marketing and Monetization Options for your Blog
As a beginner you will have the best start in the blogging world with a WordPress self-hosted blog, because you will have full ownership of it and you won’t rely on regular subscription payments to keep it up and running, apart from the web hosting cost, but those incur for any domain on the world wide web.
The following steps will be demonstrated through the SeekaHost Blog Hosting Control Panel, the SeekaPanel, meaning you will set up and manage your blog from this platform.
So, let’s expand the above-mentioned steps one by one and we recommend you execute each step while going through this guide.
1. Domain Registration and Hosting in the SeekaPanel
Before you can buy a domain, you need to choose a domain name for your blog.
Once you have found your dream domain name for your money blog, perform the following:
Register your domain

- You can head over to seekahost.app, where you can go to the client area to register your account.
- Once your account is set up, you can find the domain registration search bar in your dashboard. Simply enter the preferred domain name you have chosen and select an extension (.com, .co.uk, .org) for it in the search bar.
- Then click on search to check for its availability.
- If available, you need to pay a fee for the domain registration for a year so that you own the domain.
- Once you have made that payment, you will receive a confirmation email and you will have the domain ready in your SeekaHost App account.
- The other option is to purchase an expired domain, if you don’t have a particular domain name in mind. Please read more about how to find and buy expired domains in our Expired Domains Buying Guide. The procedure is exactly the same as with a new domain so you can follow the steps below once you have registered your expired domain.
Domain Hosting
- Once your domain is purchased, you need to publish the website and it’s content on the Internet, which requires web hosting. The web hosting server acts as a platform between the client’s browser and your website.
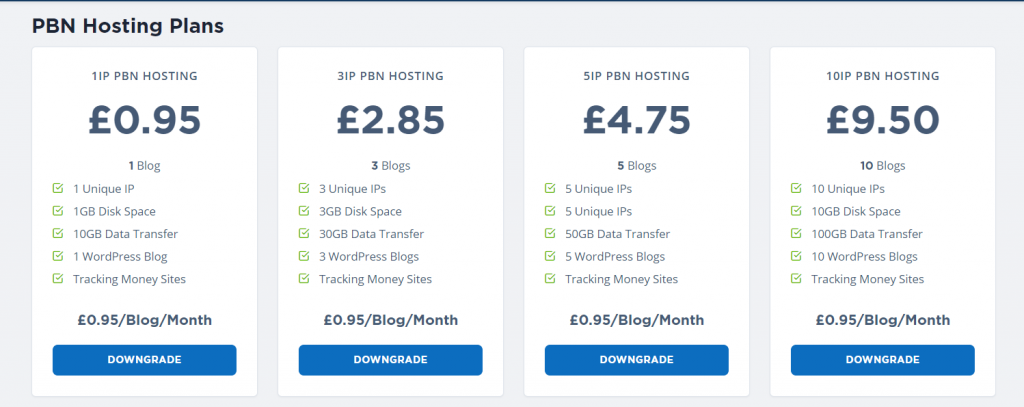
- Inside the SeekaHost App you can choose WordPress hosting or PBN hosting for your WordPress website. WordPress hosting is more suitable for complex blogs and websites with more disk space whereas PBN hosting is more suitable for basic blogs to build a private blog network.
 3. Watch the below video in full and follow the simple steps to sign up, add your domain, get web hosting and get your WordPress Blog live in 60 seconds:
2. Set Up of your WordPress Blog Inside the SeekaPanel
- Whether you have a technical background or not, WordPress will give you enough flexibility to build your blogging site in a quick and easy way with a better, simpler and faster blog experience via the SeekaPanel. Watch the quick set up tutorial to get your domain and WordPress site live in a few clicks:
2. If you have followed all the steps in the previous videos, then your WordPress blog should be up and running now. No more need for lengthy installation processes via cPanel, it all happens inside the SeekaHost App, even your SSL certificate is set up.
3. Now, it is time to set up your tracking site. All the WordPress blogs you set up inside the SeekaHost App can exclusively be tracked inside! This will save you a lot of time as in one click you have all the tracking data viaGoogle Analytics and Clicky available in your dashboard for each blog. Watch the explainer video below to get an idea of how this innovative solutions works in a few simple steps:
4. Before you can connect your website with the SeekaHost App tracking features, you need to integrate the Google Search Console with your website to access the functionalities of the search console, meaning you create a link between your website and the Google Search console. If you don’t have a Google account yet, you need to register one. Once you install the Google Analytics tool which is available free of cost you’re ready to track the performance of your websites. Follow the step by step guidance on how to integrate your website with the Google Search Console in this video:
5. To connect your website with clicky.com, you will be required to sign up with Clicky first to receive a tracking code. Once you have done so, you can head to your dashboard inside the SeekaHost App and link your blog with your Clicky account to keep track of every traffic coming in. Check out the short explainer video below so you know how to go about setting this up for your blog inside the app:
SEO and tracking go hand in hand, which is why the SeekaPanel offers this unique feature. Analyse your blog’s performance effortlessly so that you can really monetize it. Using analytics tools is vital for blog monetization and marketing of any kind. So, with the SeekaHost App you’re already ahead of the game from the start.
3. Customization of your WordPress Blog
With WordPress you have endless options to make your website stand out. You can find thousands of themes and plugins provided by WordPress that will add various features and designs to your site. Follow the steps below for the ultimate customization or watch the tutorials on the seekahost.org blog.
- Setting up your WordPress theme is super easy, but finding your ideal theme isn’t. That’s why it advisable to research the top rated WP themes listed in this 100 to free WP theme guide so you can make an informed choice of your dream theme that will make your blog look and feel exactly as you envision it. You can also buy a customized theme, if you don’t want to do all the customization yourself. Once you have chosen your theme, it’s easy to install on your WP site so just follow the steps in the tutorial to follow further on.
- Your blog will be looking good already! But there’s still more customization required. WordPress offers so many options and in the video below you can get some inspiration on how to customize your header section, your general settings of your blog, your logo and anything else to do with the appearance. You will also have to customize your author profile and your blog menu, which is also shown in the video.
- Next you should install some useful plugins, which will enhance the performance of your website by adding various useful features to it. Please read this WP Plugin Guide for bloggers first, if you’ve never heard of plugins before to understand what to look for. It’s then vital to ensure your installed plugins work the way you want them to and you need to edit their settings at times to improve their functionality. For example for SEO we recommend the All-in-One SEO plugin and in the tutorial below we show how you set it up for the best performance.
- Getting closer to perfection! But another important aspect is configuring your widgets. Widgets are basically blog sections that can be added to the side bar or footer of your blog and they provide additional information such as a calendar, weather forecast, a gallery etc. You choose what you want to display here depending on what matters to you and your audience. If you’re a travel blogger you may want to share your Instagram Feed in your side bar and your YouTube channel in your footer. You can get some inspiration by looking at blogs in your niche. Check the tutorial below on how to add and assemble widgets in WordPress.
- You did it! You’re now ready to fill your shiny new blog with valuable content.
4. Starting with Blogging and Publishing

- At this stage, you are all set to start framing the content of your blog. We recommend you first publish relevant blog pages such as an about page or a contact page to start with. To create a new page, go to the WordPress Dashboard option, from the left panel select the Page optionand click on Add New. A text editor will be displayed where you can start framing your content by adding a title, body text, media, forms etc.
- After you have completed writing the contents, review them once again and then publish it.
- We also recommend to create the text first in a Word or Google Document and to save it to ensure the content won’t get lost.
- Remember once you click publish, your contents will be displayed on the site and any user accessing your site can view it, so craft it carefully. Of course, you can edit or delete it any time as you have full control over it. If you first want to publish it as a draft you can do so by editing the status and clicking on “publish as draft” or in “private mode”, so it won’t be displayed publicly until it’s ready.
- Watch the short tutorial below to see how you can publish an about page:
6. If you want to create a contact page and you fancy adding a contact form, check out how easy this is in WordPress:
7. The technical part of composing a blog is quite simple, but if you want to compose a page and post that ranks well on search engines, there are other elements you need to consider while publishing in WordPress. We recommend you learn more about SEO in our SEO Training Course where you will find many in-depth tutorials like the one below, to fully grasp all vital SEO techniques to make your blog rise to the top.
8. Right, now your money blog is ready to attract visitors. As shown in this video, you should research your target audience and relevant keywords for their searches to drive relevant traffic to your site. This also entails learning how to write SEO-friendly content and how to tailor blog articles for the best results. You can learn this in the SEO Copywriting Course and you can also read this article about how to get Google to send you many readers.
9. Once you have published your SEO-friendly content, watch it gain more visitors every day inside your SeekaHost App dashboard where you can even check which posts are the most popular and which countries your readers come from. You can see how I do this for one of the blogs I manage, the londonbusinessnews.com blog:
![]()
10. Time to market and grow your blog to make money!
How to grow a Blog to become an Influencer?
Marketing and Monetization Options for your Blog
- This is the most essential prerequisite for the next step of ‘making money through your blogs’. We will list different marketing options available and you can decide which ones are most suitable for your niche and what you want to achieve with your blog.
- The more your blog is advertised and shared the more groundwork it will do for generating revenue in the future. But more is less and it’s important to find the right balance. Read this guide about the top 10 ways to market a business online for free and this guide about content marketing first to get an idea.
- There are various ways you can advertise your blog and make money from your blog. Among the most popular strategies, we’ll mention a few significant ones that many top bloggers also use.
-
Affiliate Marketing

This is one of the most popular trends going online which is an easy way to generate a passive income. Affiliate Marketing involves the marketing of a product or brand by promoting it to your online users on your blog. If any person buys the product by clicking thereferral link provided by you then you get a commission on that. You can find out more about various affiliate options in this affiliate beginner’s guide. All you need to do is sign up for these programs on the concerned sites, select the products and services you want and can promote via your blog and include those links into your posts with the help of affiliate WordPress plugins.
-
Sponsored ads with Google AdSense

Google AdSense helps you display ads on your website. Once you sign up with your website URL and email address, you need to select the Google AdSense code and place it on any area of your website. This will make the ads runs on your site. Also, you need not worry about the quality and effectiveness of the ads, since all these ads are thoroughly reviewed, ensuring that they are highly relevant to the audience in general. Every time the user clicks an ad, referred to as CPC (Cost per Click), you are being paid.
Features
- Make the ads selection according to your choice
- Customize where to place the ads
- Block ads which you don’t prefer
- Ads that are highest paying go live
- Ads are responsive and can be tailor viewed on any device
- Attracts more traffic to your blog
- Earns a good amount of regular income depending on your traffic
-
Selling Ads using WordPress Advertising Plugins

This is an alternative to the above discussed Google AdSense. Unlike the former, WordPress Plugins allow you to directly sell ads on your website. The major difference lies in that you don’t have to depend on the CPC mode of payment which can vary depending on the ads. You yourself can set a negotiable price. Google AdSense, on the other hand, is easier to adopt and keeps you out of the hassle of managing ads. So, if you are really after a larger payment then you can opt for WordPress Advertising Plugins such as AdRotate, Insert Post Ads, AdSanity, DoubleClick, etc. Most of such plugins not only help you sell your own selected ads but also help with managing Google AdSense. It’s a win-win situation really.
-
Sponsoring Blog Posts

Ads can be irritating at times. Superior brands and services don’t prefer populating their own blogs with ads as it may lose the impact and effectiveness of the actual content. Herein they require sponsors who can promote their ads. Like other sponsors, you are being paid to promote a brand’s ads on your blog site. All you must do is contact the companies for the sponsorship of their products. Moreover, the advertisers lookout for appealing sites with sound traffic where they can gain enough exposure and popularity. Make sure you lay this sort of foundation first and that you pitch them the advantages you can offer with advertising on your site.
-
Earning by Writing Sponsored Reviews
 What if you need to try an item or service free of cost and then review it? This is what this strategy is all about. User reviews are of utmost significance as the buyers are more interested in reading the feedback/reviews rather than just looking at images and buying a product. Because of their importance, many companies pay for written reviews, especially if they are from trusted experts in the field. It’s somewhat like sponsoring a product but after giving it a try and writing for it.
You can sign up with the companies that pay for writing the reviews. Some companies pay you directly for the reviews whereas some give freebies. You can share these reviews on your blog and earn for yourself. Before you proceed, check the authenticity of the company you’ll be dealing with. You don’t want to affect your own audience by writing a review that’s not suitable.
On a serious note, earning money through your blogs must not compromise the entire purpose and spirit of your blog. Your blogs are the pillars of your popularity. Earning through them should reflect the reward of your hard work rather than demise it. Whichever way you employ to monetize your blogs, make sure they benefit you as well as your blog and that you remain authentic.
Now that you know how to start your own blog and monetize it, start working on it gradually and ceaselessly by following some handy tips to ensure it keeps growing and thriving.


